

 Auto
Auto
 Camion
 Autobus
 Motociclette
 Militare
 Elettronica
 Armi
Armi
 Edifici
 Aerei
Aerei
 Arredamento
 Personaggi
 Animali
 Veicolo spaziale
 Cibo
Cibo
 Nave
Nave
Tutti
Hello. Today we will continue drawing Lancia Rally in 3ds Max. In the previous lesson we were working at the detailed elaboration of the front part of our car 3d model. Today we won’t touch it, because we are going to work out in detail the rest of the body. Down with long introductions! Let’s get to work.
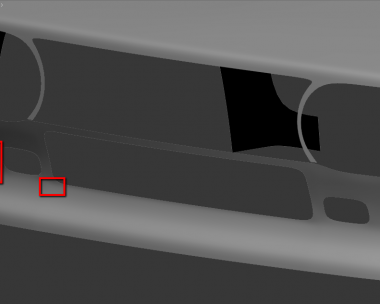
Here we have a broken line. No doubt, it’s very bad and we need to fix it. But at first we it’s necessary to finish the door.

Right now our task is to repeat this curve.

And again crease tool will help us.


Now we adjust the line itself.


When smoothed we should get something like this.

Since our points lie in 3D space, we need to adjust them with x-axis. From this angle you can see the curvature perfectly well.


We temporarily remove these edge loops, because now they are only going to complicate our work. It will be much easier to remove them first, do all the manipulations and then add them again. In addition, the curvature of this edge varies lengthwise the car body.


We apply crease tool at the place where the remaining edge loop is.

Here we temporarily apply crease tool as well.


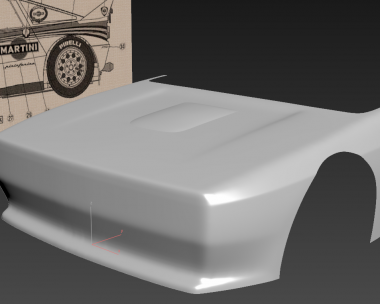
Now we need to adjust the back part of the car. In fact, forepart and rear are the most recognizable parts of any automobile, and so they should be as detailed as possible. Next, we select these polygons and temporarily hide them. Don’t ask me why, just do it.

After we have hidden the part of the model it makes working with the rear much easier.


We apply crease tool on these edges.

To see hidden polygons just click “Unhide All”.

Now we must level this edge loop.


Please, pay your attention to this surface.

After a couple of adjustments with the back part, we’ve got an extra salience here. So we need to give this surface the correct relief.

Yeah, that’s much better!

Now we are horrified to discover that here we have a flat area! There is only one edge, and to make some relief there should be at least two edges. It’s a goon chance for us to remove the triangle as well.
With the help of the tool cut we do what we need to do.

And we continue our work.


This surface has a curve.

Now we are going to create it.


Racing version of our Lancia has a lattice from behind. If we prepare now the space for this lattice, it will somehow simplify our lives in the future.


Now it’s high time to get rid of this triangle.


Earlier, we’ve already got rid of the triangle here, but it has appeared again. That’s why I hate triangles =)


And back to work! Now we need to correct topology on the engine cover. Turn on constraints by edges and make the mesh smoother.


Although we shifted vertexes lengthwise the edges, it could have created surface irregularities. Just fix it at once.

As I have already warned you earlier in this series of lessons, our blueprint is a little bit inexact. It’s impossible to see this rib from the side view.

But it won’t in the least stop us. In order to draw it correctly we need to perform a little preparation.

Let’s shift this edge a bit, because it will be a door opening line.
Now we clear some space here for this edge.

And apply connect.

Our edge can be seen clearly from the front view.


And if we look from above.


It didn’t come out well here, so let’s fix it.


We should also shift these edges a little bit lower.


And we again apply crease tool.

With each lesson we are getting closer and closer to our goal.


We’ve got here some gaps since the number of edge loops lengthwise the car in the front and in the rest of the body is different. We will begin our next lesson with fixing it.

Don’t forget to check for updates. Good luck to everyone! Today we are even closer to our goal! PNFHUKSZR9BB
Have a nice render!


exlente tutorial felicidades