 Auto
Auto
 Camion
 Autobus
 Motociclette
 Militare
 Elettronica
 Armi
Armi
 Edifici
 Aerei
Aerei
 Arredamento
 Personaggi
 Animali
 Veicolo spaziale
 Cibo
Cibo
 Nave
Nave
Tutti
Hi there, community! Today we’d like to show you the process of making the work “The Champion” by a marvelous 3D artist Eugene Gittsigrat. Since 2003 he is working on visual effects for films and advertising, enjoys photography and sports. We are sure that you will enjoy this making-of, especially since you could have seen this render earlier in our Gallery.
The pipeline will contain the following programs: Google, Z-brush, Maya, Mari, Nuke + LR. I won’t go into details telling what buttons to push and where. Studying tools lies on you) The work begins with Google: looking through, collecting information and studying the subject – here is a big advantage of our profession – the constant process of studying.
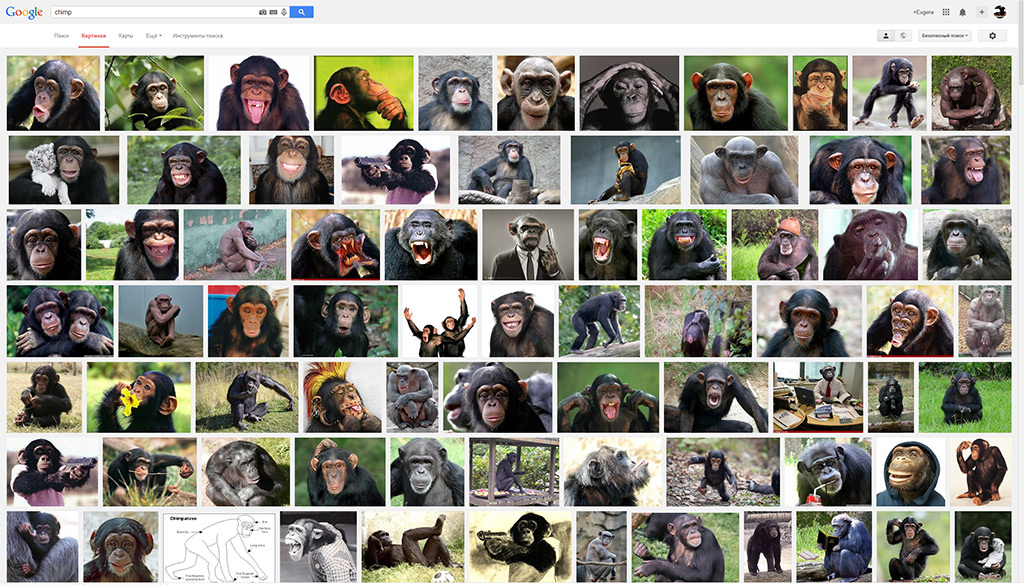
We need an image of a real monkey, without any stylizations, simplifications and exaggerations. Correct proportions and regular appearance. The character should be studied in detail, every trifle is very important. “Thanks God, it’s my personal project and a static picture, a portrait”, – Eugene says.
All researches and developments for this render hadn’t gone beyond a week of evening sitting and downloading pictures. Placing such character in a real project needs more time studying and more specialists involved. After the necessary general research we are ready to work.
Eugene says, he likes this software a lot and strives to devote more time to it.
The artist drew the skull made for a greater understanding of anatomy. When finished the sketch of the monkey, he decided to add something that would complicate the nature of the character. The choice fell on the helmet. The football one turned to be the most distinctive. After trying the helmet on and setting the desired angle an impressive composition came out. Now the work with the sketch is over and we can move on. According to Eugene, sometimes the interest to the project on this stage decreases and the character “goes to landfill”. “I’ve never resumed the project after that. I suppose, it is right thing to do.”
The technical stage comes next – retopology and UV. For the small objects we use Z-brush, turns out nice and fast. Having the right mood you can make the monkey by hand using Maya. In general, for such task a remesher would be enough.
The final detailed elaboration of the object comes after retopology and UV
Monkeys have large and specific muzzle wrinkles. With the help of the map we use displacement vector to reproduce them as accurately as possible.
When working with UV multipatches (textures sequence) helps a lot. According to our own whims we set UV, dividing all object by materials combined. Then we join them up and create a sequence.
It’s all more complicated with monkey, because it’s difficult to put all the channels. And so we’re going to show you how to do it object by object.
In general, the list is as follows:
SSS
– shallow scatter
– mid scatter
– deep scatter
Spec 1
– color
– roughness
– weight
Spec 2
– color
– roughness
– weight
Diff
– color
– weight
Mask
-water refl
-sss
-face
vector disp
bump
Total size of all maps resulted to be 2.5Gb
Here is only the name of pose, actually) Three-quarters turn on camera and a slight shift of the lower jaw to get a malocclusion. Next, we raise left eyebrow, lower the right one and wrinkle the nose a little. Making the final assembly of the stage Eugene always uses blend shape in order to be able to resume without any problems to the default pose.
Then base texturing and we move on to lighting.
We set a basic lighting on a gray material with displacement or we load 3-4 levels from Z-brush. Final texturing takes place when materials is set that means we will return to Z-brush and Mari later for all necessary adjustments.
Usually working with Prman for this render the author decided to try Arnold renderer. He applied all standard materials and lightings which are used in the render.
During this process we collect trial “composes”.
Hair composing is a separate question. We are going to outline the general framework; for our static picture it will be more than enough.
So, the first thing you need to do is to create curves. We will use them further for combing our monkey. After this we create “shave” and apply curves to control “shave” hair and get direct basic comb. Then using “shave” brush we achieve the desired result.
Now we may create a couple of hair systems to make setup more convenient. Of course, you can try to do everything in one single system, but you’ll have to spend a lot more time for setting it up. When such approach resources are minimal.
Having a combed hair with the help of standard shave tools, we make lengthwise random, hair curvature and bends. It would be great if you draw maps on these parameters – making hair in that way more detailed. Also, don’t forget about an important clumping parameter (setting hair tufts). Hair tufts can be drawn with the help of maps as well. In such a way you can a quite complicated surface. Of course, you may not draw maps and perform everything with brushes (it is static picture, anyway).
Also, it would be a good to make base and tip maps hair width. The shorter hair is, the thinner it should be (unless the case is about long hair cut).
Hair shading with the help of standard tools is not difficult at all. Shave tools are simple and clear. Anyway, we recommend you to read a guide if you are going to use this plug-in for the first time.
And remember: details are very important. Analyze, compare, pay a lot of attention to the details.
For compositing we use Nuke + LightRoom (LR). 16bit render output + AOV for bigger capabilities when composing.
Of course, you can assemble everything in Adobe Photoshop. The most important is to get the desired result.
We need to color correction of the final image. The author has performed it in LR since he enjoys photography and this software allows working effectively with picture development, creating your own setups and changing colors in no time. Color correction affects image perception a lot. Using only one color you can alter radically the mood of the render, both improving and worsening your work.

It’s up to the artist what software to apply and in what quantity (if we are talking about working independently and not in the company). Eugene says, he likes to have a flexible set of software so that he can make changes and modifications at any time.
Again, you can do everything in Adobe Photoshop) You can create some samples and patterns thus making your work a little bit more pleasant when corrections and adjustments.
Well, it’s great if you read this article up to the end) We’ve tried to tell you the principles of working process without going into details which can make you a hostage of stereotype pattern. It’s better to understand the main point rather than cramming which buttons to press.
Thank you all and have a nice render!
Add a comment