

 車
車
 トラック
トラック
 バス
バス
 オートバイ
オートバイ
 ミリタリー
ミリタリー
 電子機器
電子機器
 銃
銃
 建物
建物
 航空機
航空機
 家具
家具
 キャラクター
 動物
動物
 探査機
探査機
 食品
食品
 船
船
っと見る
Hi everyone! We continue a series of short interviews with the best artists from Hum3D competitions.
Daniel Vesterbaek, the winner of the Car render challenge 2019, will answer on six questions and give us a look behind the scenes of his work.
– Tell us a little bit about yourself. What do you do and how did you become a 3D artist?
I am a 22-year-old guy living in Denmark. During the week I am working at a motion design studio in Aarhus and at the weekends I am usually spending my time working on my own projects or freelance projects. I have always been fascinated with films and animations and for the last 7 years I have been spending a lot of time doing 3D related stuff, including stills, animations, models, real-time graphics and most recently I started getting into immersive experiences (VR).
My career started when I got contacted by a German company, who were just starting out using Blender as their main 3D package. They had seen my work and tutorials online and decided to reach out to me. At that studio I encountered so many new words and concepts, because, at that time, I barely knew what “workflow” and “pipeline” meant. It was a great experience and I learned a lot.
– What’s your favorite aspect of creating 3D art? Is there something you specialize in and enjoy the most?
The aspect I like the most is the lighting process. I think light can communicate so much and it is a tool that can draw the focus to one object instead of another. I am always fascinated by all the professional cinematographers and painters and love to study Hollywood films, advertisements and paintings to decode how the artist lit the scenes and why the artist took that specific approach.
– What or who inspires you today? Are you a member of any art communities? Any favorite hashtags you check on a daily basis?
I am a member of the BlenderArtists.org community, where I regularly check out the new artworks. I also use Artstation a lot, but not daily. Apart from that, at the office we often send each other links to motion designers and other great artists we admire.
– Please tell us your five short tips for creating 3D art.
– Be patient. The last 10% might take 90% of the time to create, but it might be the details that sell the render.
– Contrasts are everything. Use a contrasting size, color, detail level, theme/mood, speed/motion or brightness to draw the attention to specific elements of your scene.
– Every click matters. Place objects with purpose, use colors with purpose, use lights with purpose – Everything with purpose. Compare different options to see what works best. If you just click random things and settle with the first option you pick, you won’t end up with the best result. Use theories about composition, color, weight, detail level, silhouettes and motion/animation to decide what will serve your render better.
– Use gradients. If you take a picture in the real world almost every surface will have some kind of gradient (or multiple) on it. In a photograph you will never have a surface that is just made up of a lot of uniformly colored pixels. Gradient and IES lights, AO, fresnel and bounce light are elements that can create gradients on surfaces in your scene.
– Work every day. I find that it is much easier to stay motivated when I work on my projects every day – At least just for a little time.
– Could you please show us any images from the latest work process with a short description. Where did the idea come from? Did you learn something new?
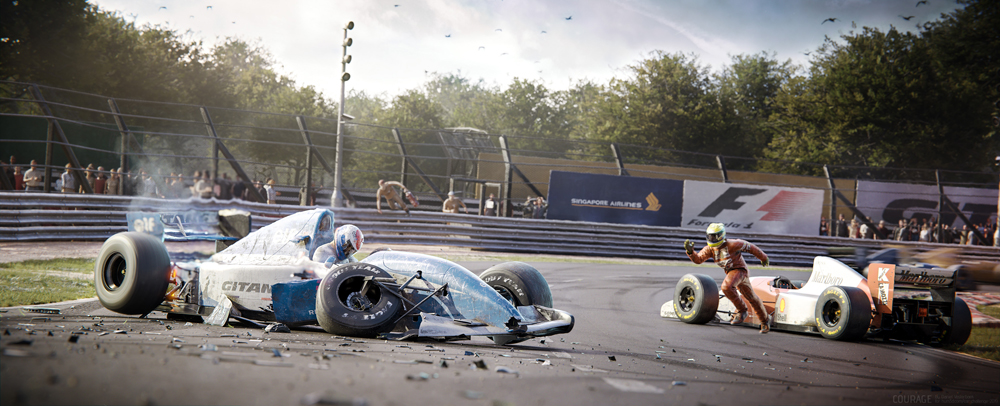
My latest personal project is “Courage”, which I made for the Hum3D Car Render Challenge 2019. I learned a lot from working on this render and the best thing was that I had a very clear idea about what story I wanted to tell before I even opened my 3D software. Having a very clear goal was helping me to keep focus during the project.
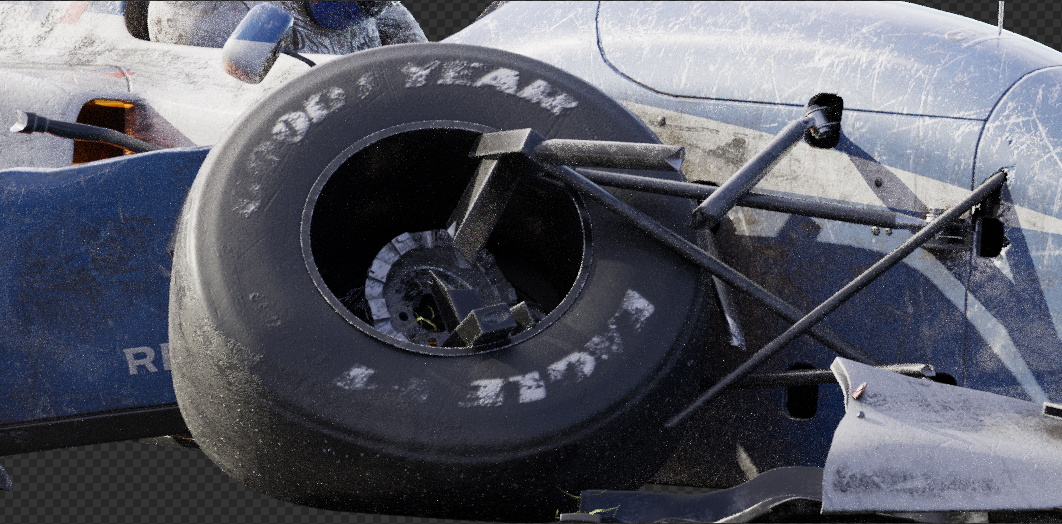
I wanted to care a lot for the small details on the crashed F1 as this object was the most important object of the story. For that reason I spent around 75% of the time on modeling, deforming, shading and lighting that object. To create realistic-looking deformations and broken parts, I gathered a huge library of reference photos of crashed F1 cars and of different materials in a worn or broken state. I tried to tell small stories with the broken parts. I tried to imagine what forces the parts had been exposed to during the crash and how they would have been reacting to those forces. From references I learned that the bars connected to the wheel would snap, not bend and that they were made of bright metal on the inside. The car body however, could both bend and snap. To sell the effect that the car had been driving on the road I also added a particle system with tiny rocks around the wheel.
A lot of these details won’t be noticed by everybody, but I still think it is worth spending time creating them. The real world is so complex and we need to show as much of this complexity in our scenes as possible.
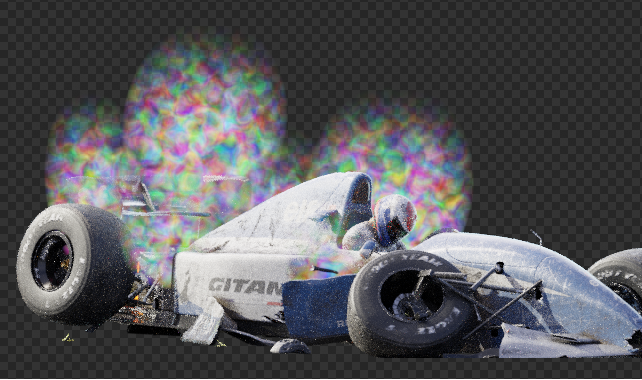
To create the heat distortion I used a rendered info-layer from my 3D software. This layer enabled me to locate the heat distortion very accurately in 3D space. In post-processing I would use the noise to displace and blur the pixels based on the difference in color. After finding this method of doing heat distortion I have been using it in almost every project.
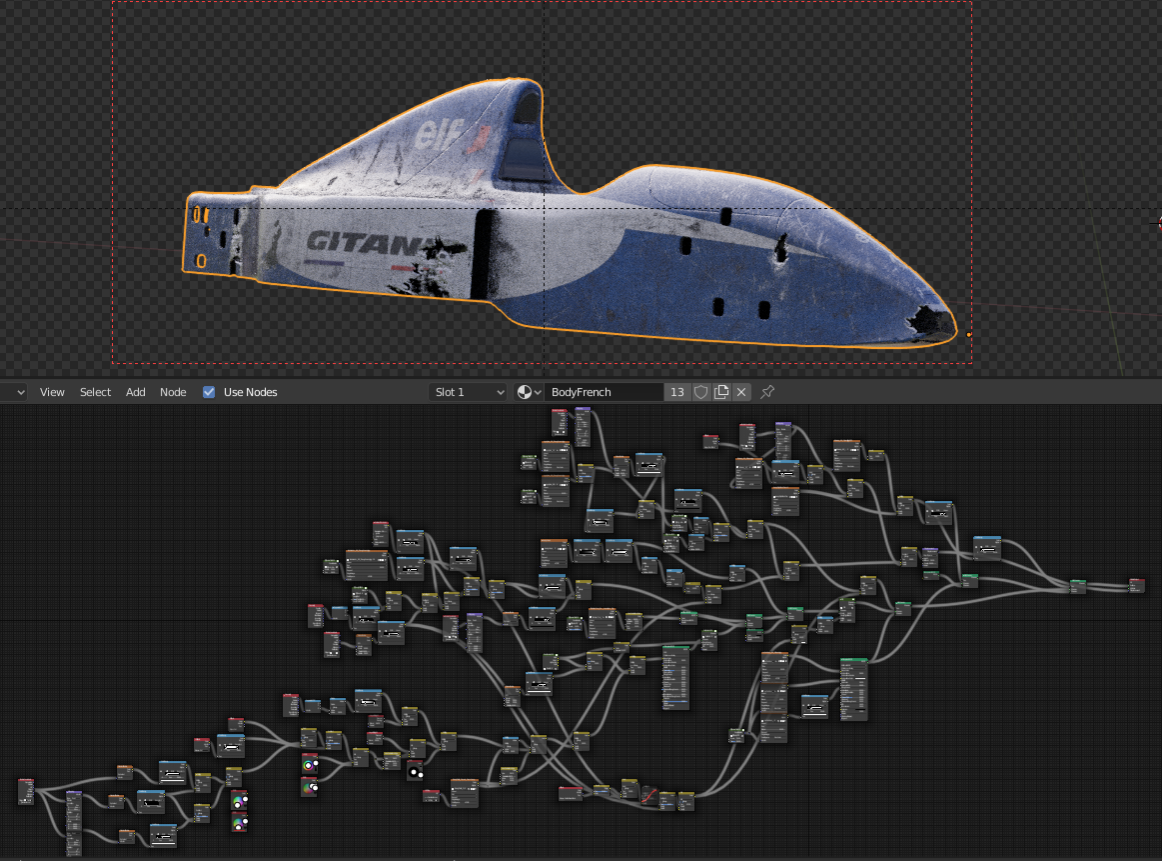
To keep the possibility of quickly adjusting the material of the main car open I created the material with all the holes and effects procedurally inside my 3D package. In the end I had a mess of noodles and nodes and if I were collaborating with anybody on the project I would definitely have had to structure the node tree better.
Doing the material this way increased the render times, but it made the entire scene and all the components very accessible and allowed me to always just mute and un-mute nodes on the fly to see different options.
– Which of your designs/part of scene/model are you most like and why?
I am most proud of the crashed F1 in the scene. Before this project I had never tried making a deformed/crashed car before, so it was a big challenge for me with a lot of research and development in it. It surprised me how important references are for creating realistic deformations. It’s something we don’t see so often and I suppose that’s why it is hard to create it without references. I learned a lot from making that model and that’s why I like that object in the scene the most.


コメントの追加