

 車
車
 トラック
トラック
 バス
バス
 オートバイ
オートバイ
 ミリタリー
ミリタリー
 電子機器
電子機器
 銃
銃
 建物
建物
 航空機
航空機
 家具
家具
 キャラクター
 動物
動物
 探査機
探査機
 食品
食品
 船
船
っと見る
Hello, my name is Antoni Dendrou. I joined the world of 3D about 7 years ago and haven’t stopped discovering its beauty ever since. The reason I started was to visualize cars, as I am deeply interested in car design. I prefer working in all stages of production, from concept to post-production, so as to give the final image or video the intended meaning and expression. The past two years I am involved with architectural and other artistic projects with my associates at TAMA based in Switzerland. You can visit our site, tama3dartistes.ch for more details.
I would like to start by thanking the Humster3d team for their excellent car rendering competition and for giving me the opportunity to share my workflow with the community.
I started thinking about this project several weeks after the announcement of the competition; it was completed in about four weeks of working in my free time, three to five hours at night. The idea I had was clear from the beginning, I wanted to portray the spirit and ambiance of the epic rally races of the 60s-70s. Two cars were in my mind, the Lancia Stratos and the Renault Alpine. After spending some time searching online for inspirational photos with the character I was looking for, I decided to go with the second, in a Rally Acropolis scenery.
Sketching is usually the best way to visualize a hazy thought of what I want to make, so that is what I usually do first, either by hand or in Photoshop.

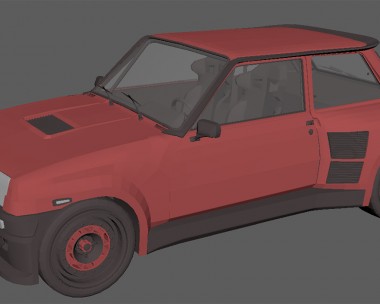
With that more or less representing what I had in mind, I started modeling the car in Blender with traditional polygonal modeling techniques, placing and shaping all the elements as accurately as possible; I place a lot of importance in a true representation of the 3D model, fine-tuning the bodywork surfaces, then gradually adding finer and finer details. When creating historical vehicles I end up spending more time on research than modeling. As there are countless variations and makes, one needs to keep details very accurate.


Then, using spheres and cubes, I blocked out the general shapes of the environment. I made a low poly version of the Alpine model so as to pose it quickly. The geometry is only basic, just enough to see the general 3d setup.

I gradually sculpted the scene in more detail. The scenery at this stage is still one big mesh covering the cliff, rocks and road.

Something was bugging me with the composition, so I mirror imaged the scene before sculpting it in more detail. I believe it is much more natural-looking considering the usual reading direction of viewers’ eye from left to right.

Before completing the modeling, I always like to start visualizing the lighting; it usually greatly influences the details that will be added. Although there are several really popular methods for proper lighting, I like to test all the angles with a neutral material applied to all objects, it helps to see which lighting makes the subject pop out the most.

Then I separated the landscape mesh into smaller objects so as to sculpt-in finer details and modeled the whole scene to the finest level of detail. Shaders were developed for each object throughout the modeling process. Over the next few images I go through several objects in detail.

For the cliff I used Blender’s powerful sculpting tools, gradually adding more and more details until it looked good. Then I added a subsurf modifier and a displacement modifier so as to add finer bumps and details to the mesh. I designed the shader so as to apply a bright rock material to the sharp edges and a darker, smoother material to the smooth parts. Moss is scattered all over (mostly in the crevices). These three materials get further procedural variations of themselves, mixed using grunge maps.


The stone wall is created by applying a displacement modifier to a flat high-res mesh with general shape. The modifier uses a height map I generated in Substance B2M from a 4K texture. B2M is a very powerful tool for all natural textures; I use it to generate roughness maps, normal maps, and height maps. For the stone wall the material is simpler than for the cliffs. It is a rock shader with some procedural grunge variations on it combined with a randomly scattered moss texture.


I created the road in more or less the same way, using a basic subdivided mesh with a displacement map applied to it. The shader consists of one base dirt material with procedural variations and a second material for the more gravel-covered parts which is applied with a weight map.


Before finalizing the scene, I went back to the high-res car, UV Unwrapped it and created its racing colors in Photoshop, which I loaded into Substance Painter to add dirt, scratches and other subtle details. I then baked the maps that I painted so as to use them back in Blender Cycles’ shader nodes.

After some late midnight hours spent on adding-in details and fine-tuning materials as well as endlessly adjusting the camera, I came up with the completely populated scene. The grass is a hair particle system scattering different grass clumps all over, on which is applied the grass shader with fine random variations to it; the ivy is a combination of Blender’s IvyGen plugin and modeled ivy branches. I used an HDR map for the final lighting.


I was pretty satisfied with the render result so, apart from compositing-in the dust and painting a driver and co-driver, I focused on adding the proper lens effects and color adjustments so as to make the atmosphere more vibrant. I also added the radial blur for the wheels in post for the sake of speed.

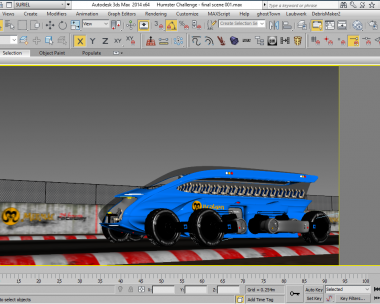
Et voila, the final composition with post-production completed. I hope you enjoyed following this making-of, and that it is of some inspirational value to you. I would like to mention the use of textures from the websites textures.com and texturify.com and thank them for providing textures of excellent quality. Thanks for reading!


コメントの追加