

 Автомобілі
 Вантажівки
 Автобуси
 Мотоцикли
 Озброєння
 Електроніка
 Зброя
Зброя
 Будівлі
 Авіація
 Меблі
Меблі
 Персонажі
 Тварини
 Космос
 Їжа
Їжа
 Кораблі
Теми
This year our studio was so busy with plenty of projects and I didn’t have enough free time, but when I saw Hum3D Car Render Challenge, I decided to test my skills, so I participated and it was a good experience. I saw many good works and now it’s my honor to be invited to write about my project for Humster3d.com.
I’ve always liked to model muscle and classic American cars. That’s why I chose my favorite car – “Chevrolet Impala 1963”. Now, due to a lack of time, I’ll try to give in this tutorial the most important and useful tips.
 My name is Omid Changizi, I’m a 21-years-old 3D artist working at “TarhMandegar” Studio in Tehran. I graduated from technical school and got my diploma in computer science; now I am studying art & graphic to get a bachelor’s degree. I always try to do my best using in my 3d projects everything that I learned in university, including color composition and photography. It was exactly 5 years ago that I find myself and realized what my interests are. Computer games have always been my main interest.
Eventually, my passion and my hard work helped me in learning 3D modeling in 3ds Max in just 1 year. Since I like cars, I decided to focus on car modeling. Now I’m developing my skills in other fields like texturing, lighting and rendering. My passion for this great industry grows deeper with each day that passes.
Last year I improved my skills in car and military design. I believe this phrase which says “to increase your knowledge you should learn lots of things every day, and it’s still not enough! Please, visit my Facebook for more works.
First of all I needed a lot of photos and references, so I searched the Internet and found a good blueprint and some nice photos in proper angles; however, the blueprint needed some changes so I edited it. I also had some interesting idea about how I should render the car.


During modeling phase I used a simple box. Blueprint scale is very important because it should match with the box scale so that the model comes out realistic in the end. Of course, before you start the modeling, the blueprint itself should look like a standard blueprint.

I used a simple modeling plan and converted it to editable poly. I usually start with the roof and then go on until car body is completed. Usually you don’t need to model both sides because you can use “symmetry” modifier to make your model more accurate.

I usually hide some parts of the car, for example, car lights and windows to see things more clearly.

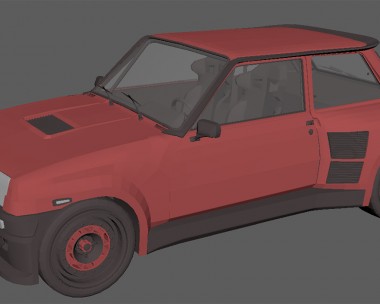
When body modeling was finished, I should have worked on the details. Just look at the photos below:


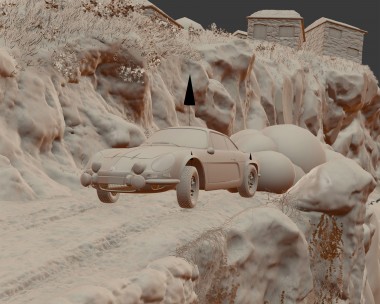
For the environmental background I found this picture because it seemed suitable for my work. So I decided to realize my idea using this environment designing the exact moment the car is dancing under this bridge.


When I finished the environment modeling I began placing the camera to get a nice angle of the scene. Finally, to put the car into the environment I used Golden Ratio which is very important in photography.


Like on the photo I used for the environment, I needed the sun and sky. So I used “geo sphere”, applied V-ray light material and then used a good picture for the sky. I also put the sun in a specific position to get the shadows I needed for my scene.

I set render setting very quickly, like on this photo below:

Test Render

Here you can see some important materials that I made for this project.


Test Render with materials

In this part we can fix some problems that may have occurred, such things like colors, contrast and lighting problems. Also we can add some visual effects to make our work more beautiful. To do this I used Photoshop. I’m going to list for you the steps in Photoshop very briefly:

Post pro steps:
-Increasing and fixing the saturation of the distant buildings;
-Fixing Contrast and Brightness of the render;
-Fixing Shadows and ground;
-Fixing CarPaint Contrast and Saturation;
-Use Z-depth map for making good focus on the car and using Depth of Field;
-Making Sky and Sun Glow and Fixing Saturation and Contrast;
-Making Metal Glows and other effects;
-Checking and fixing image Black color (-10% or +10%);
-Making Chromatic Aberration effect, adding some noise and effects of Photography Failure;
-Making Vignetting Effect;
-Final Checking.
Here is final image:

I hope you all enjoyed the tutorial and again, due to a lack of time, I just explained the most important and useful moments.
At the end I would like to thank Humster3D team for this honor.
Good luck.


This is some awesome work.
Awesome work, did you try to 3d print the final stance/model ?
Any chance you share the model from the ‘test render’ ?