

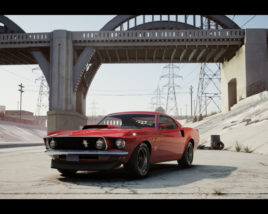
 Автомобілі
 Вантажівки
 Автобуси
 Мотоцикли
 Озброєння
 Електроніка
 Зброя
Зброя
 Будівлі
 Авіація
 Меблі
Меблі
 Персонажі
 Тварини
 Космос
 Їжа
Їжа
 Кораблі
Теми
Hi everyone! We continue a series of short interviews with the best artists from Hum3D competitions.
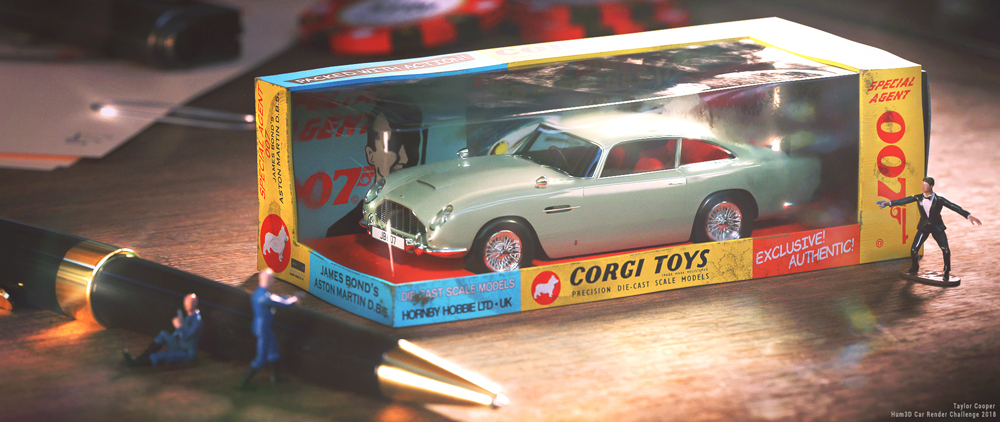
Taylor Cooper, the author of work “On Her Majesty’s Secret Service” and the winner of the Car Render Challenge 2018, will answer on six questions and give us a look behind the work.
– Tell us a little bit about yourself. How did you become a 3D artist?
I first began 3D modelling during my time in college. I was taught the basics using the tools and techniques associated with 3D modelling and began producing work for assignments, and then for my own personal enjoyment. I developed an interest in Visual Effects while studying at University, specifically matchmoving with the goal of seamlessly integrating my 3D models into live action footage. It was at this point that I really started to work harder on developing my 3D modelling work, so that I could create more realistic and interesting models for my VFX projects. It is with these same models, that I also began to enjoy developing still 3D modelling shots.
– What’s your favorite aspect of creating 3D art? Is there something you specialize in and enjoy the most?
I enjoy all aspects of creating 3D art, from modelling, to lighting and finally compositing the final image. Most recently though, I have found a lot of enjoyment producing textures within Substance Painter and shading with RenderMan. For example, when working on the textures for the toy box in my scene, it was nice to get stuck in trying to make the box look old, worn and damaged – referring often to reference imagery I had gathered before beginning my project. Also, while completing this project, I really enjoyed compositing the final image and trying to make it pop and look as pleasing a final image as possible.
– What or who inspires you today?
I’m inspired by photorealistic and hard surface modelling techniques and 3D art. I follow a lot of artists on social media and in particular ArtStation and enjoy looking at new pieces of work and the direction artists take in new projects to change and improve their work and style. I also find a lot of inspiration for modelling projects in film and feature animation (especially films by Pixar), and this has particularly helped me a lot with my VFX work.
– Please tell us your five short tips for creating realistic renders?
– Gather and work from reference imagery. This includes references for the modelling aspects of the shot and also references for how you may want to light and composite the final shot.
– Imperfections in the modelling and textures of the objects in the scene are key in creating a more natural and realistic look. Try adding: dirt, dust, and general wear and tear to your objects in realistic places where this would appear. On a car for example, fingerprint marks around the windows and door handles, scratches around the front bumper and windshield, and dirt in the tyres.
– Consider aspects of real life photography when setting up a camera in 3D and also compositing your final render. Focal length, depth of field, motion blur, lens distortion, lens flares, etc. can help add a more realistic and familiar photographic look to your final image.
– I also find good composition of the shot and staging of the objects in the scene is also very important to achieve a realistic render.
– Finally, take breaks from your work so that you can look again at the piece with fresh eyes and a new perspective. Also, ask others to offer feedback on parts of your work that you’re unsure about. For me it was the staging of the objects in my scene and where to set up the camera, but with some advice, different opinions and a fresh take, I was able to find the final shot that I was pleased with after many iterations.
– Could you please show us any images from the work process with a short description.
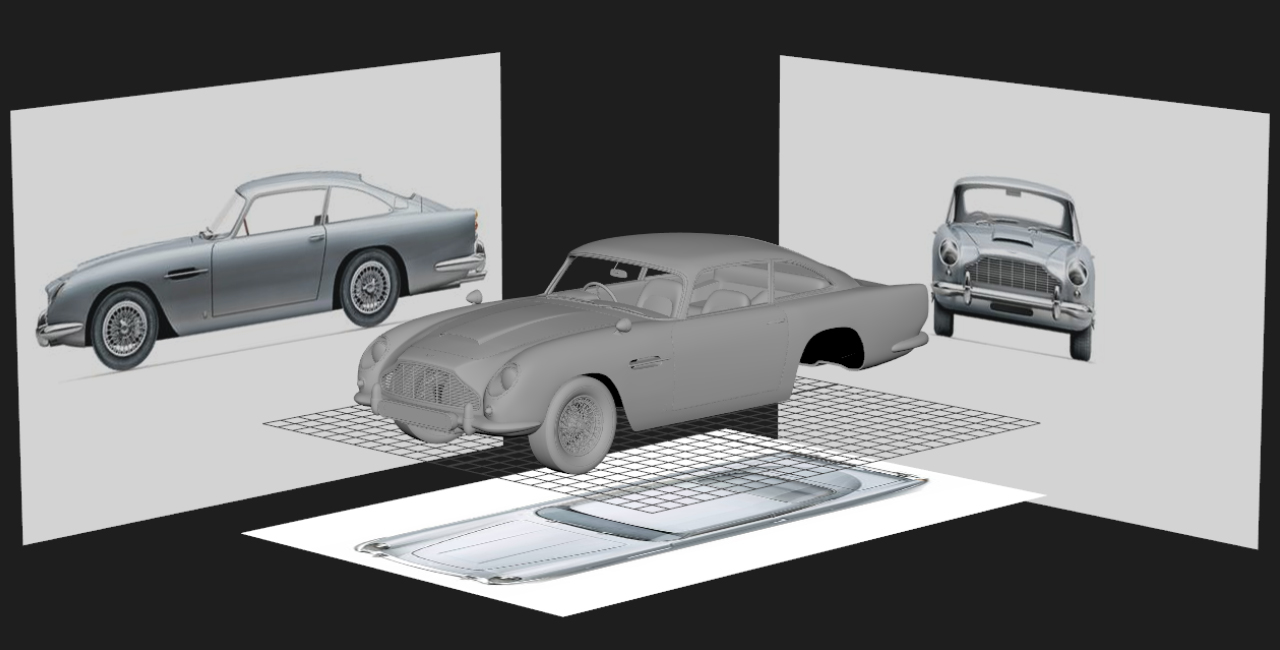
I began by completing the modelling and UV unwrapping of the Aston Martin DB5 car in Autodesk Maya.

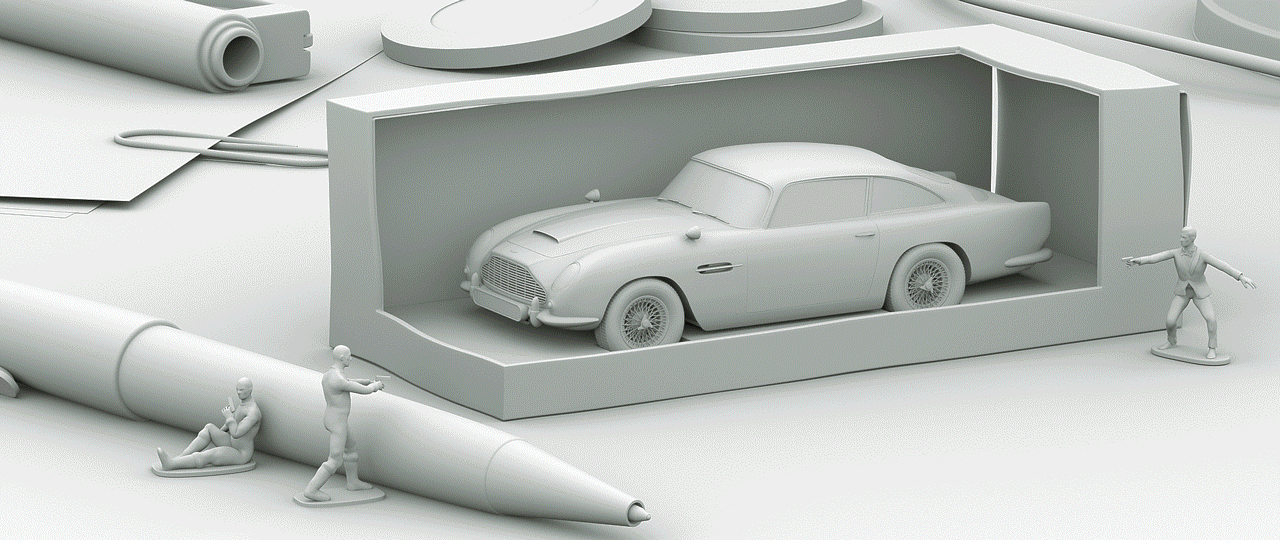
After texturing (in Substance Painter) and shading (with RenderMan) the car, I worked on the worn toy box. I produced a number of test images to see how the shaders and textures worked with my different ideas for lighting. In these images I also tried to test different camera angles to see which was best to make the box look miniature.

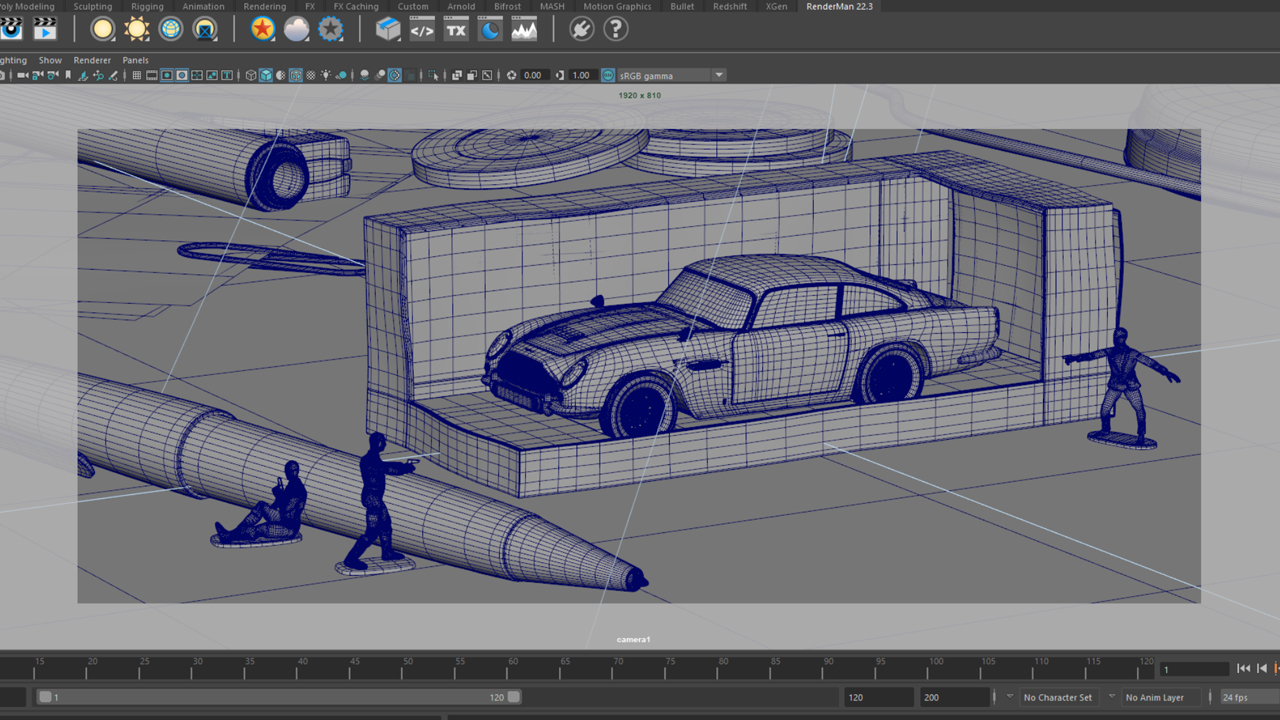
This is an image of the final laid out scene before I set up for rendering.
I then spent time compositing the final image. Here are some of the colour correction passes during this process.
– Which of your designs are you most proud of and why?
I’m quite proud of the final image as a whole, I think the composition and lighting really help bring it to life. In particular though I am very pleased with the way the car appears in the toy box. The exaggerated fingerprint marks and dirt on the box helped get across the scale of the car in amongst the other objects in the scene. Also, the Aston Martin DB5 car was something I had been considering modelling in 3D for a long time and had always wanted to since starting to practice 3D modelling. So by completing this work I was able to look back, reflecting on how far I had come since starting out on my first couple of 3D projects.


Add a comment