 汽车
汽车
 卡车
卡车
 公交车
公交车
 摩托车
摩托车
 军事
军事
 电子产品
电子产品
 枪支
枪支
 建筑物
建筑物
 飞机
飞机
 家具
家具
 角色
角色
 动物
动物
 航天器
航天器
 食品
食品
 船只
船只
更多
Many of you, probably, have already seen the cartoon Fortress, which has created by talented CG-animator Dmitry Fedotov. By this time the video has been viewed more than 1.488.000 times and won the Audience Award at the Animated Film Festival 2013 organized by TV-channel “2×2”. The author created this two minute video himself entirely on his home computer and even made a little “making of”, which we are publishing here with his permission.
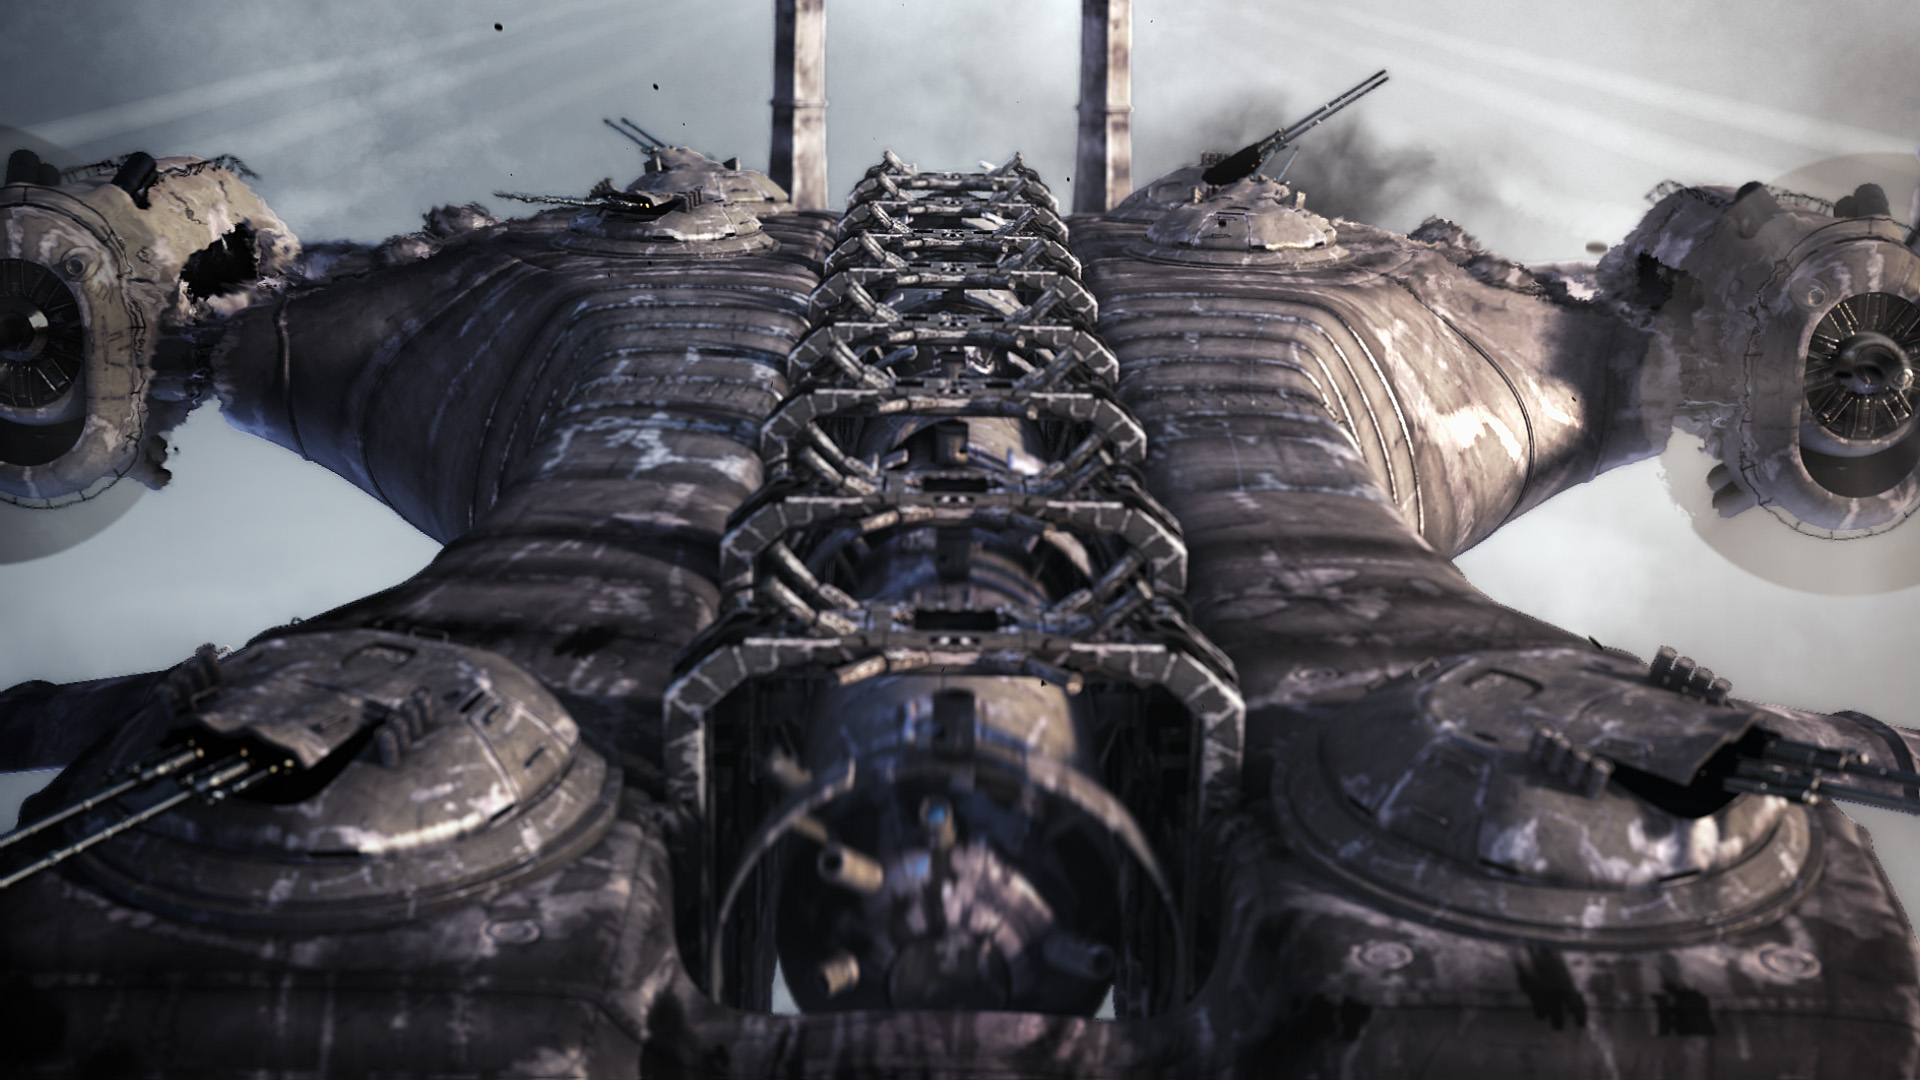
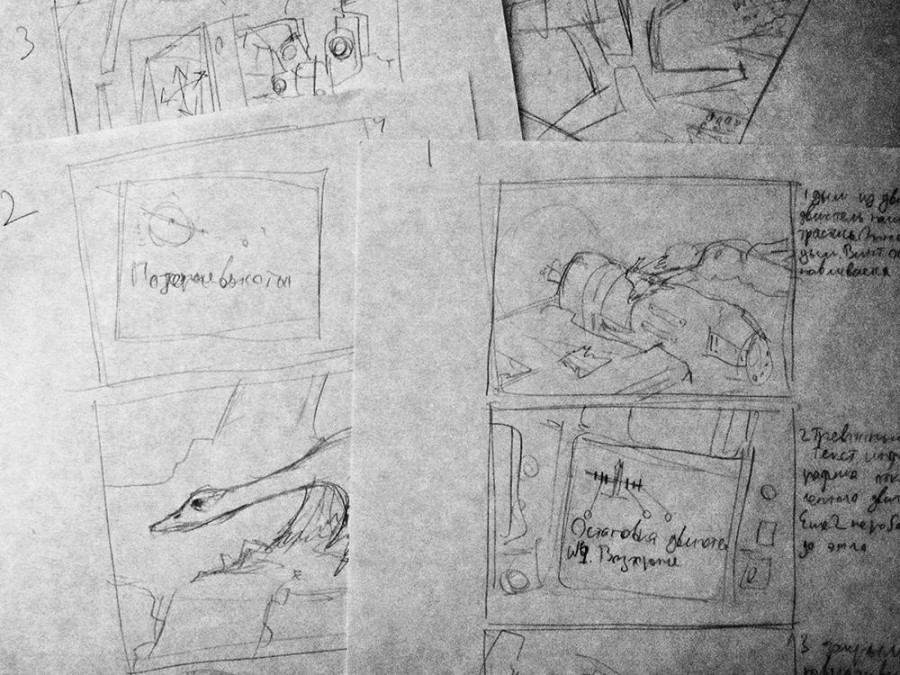
First thing we need to do is to elaborate a “diabolical scheme” or, bluntly speaking, scenario – draw storyboards, think out how long this or that scene would last and where it would be. Short-films differ from full-length films: at the planning stage they can be entirely kept in mind. That is, closing your eyes, you may imagine scenes and snapshots, stretching the frames and changing the angles. It is quite possible, if your cartoon has just about 40 scenes, which, in addition, can be divided into parts: exposition, action, culmination and denouement. But don’t rely on your memory – it can go on vacation, – the achieved result should be written down. Therefore, we need storyboards: we draw samples of scenes, marking their duration and describing in brief what is happening on the screen. Despite years of experience with tablet, the author still performs them free-hand.
When everything is planned out, it would be nice to make an animatic. To be more exact, it’s mandatory if you’re working in team. Otherwise, every artist is going to make his own separate cartoon.
Animatics is a cartoon made of primitive sketches. He is very relative, but it helps understand the consequence of scenes, their duration and much more. At this stage it is very easy to trade places of scenes, to remove them and add new ones. Animatics doesn’t take too much time, and when it’s ready, you can already see the final result – by a certain stretch of imagination, of course. After drawing animatics the only thing left is to fill the already marked scene. Sure, provided that you don’t change something during the work process, recasting and improving the plot. And this happens almost every time. The author tells that at the beginning the bomber-plane should have been a train and it was just a part of another plot. That’s why animatics is not an obligatory part while creating a CG-cartoon. Nevertheless, if you don’t keep the cartoon in your head, you should draw animatics.
Before we proceed with modeling, animation and other things, we need to design all of our characters. In fact, all these stages – animatics, storyboard, scenario, concepts – can be intermixed, being only parts of one single process – planning. That means that you can do everything simultaneously. Some snapshots, for example, may appear just out of an interesting scene or object design. In other words, if your character has a very expressive nose, you can’t but take a close-up of it – and your cartoon is added by a new scene.
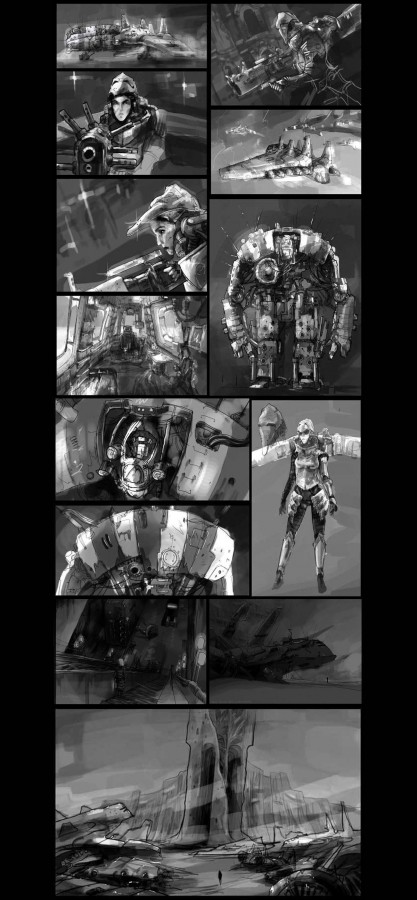
And here you can see a set of concepts from one of Dmitry’s projects. They are more demonstrative, because, according to the author, he worked them out better. In the theory, every project should have hundreds of such sketches attached.
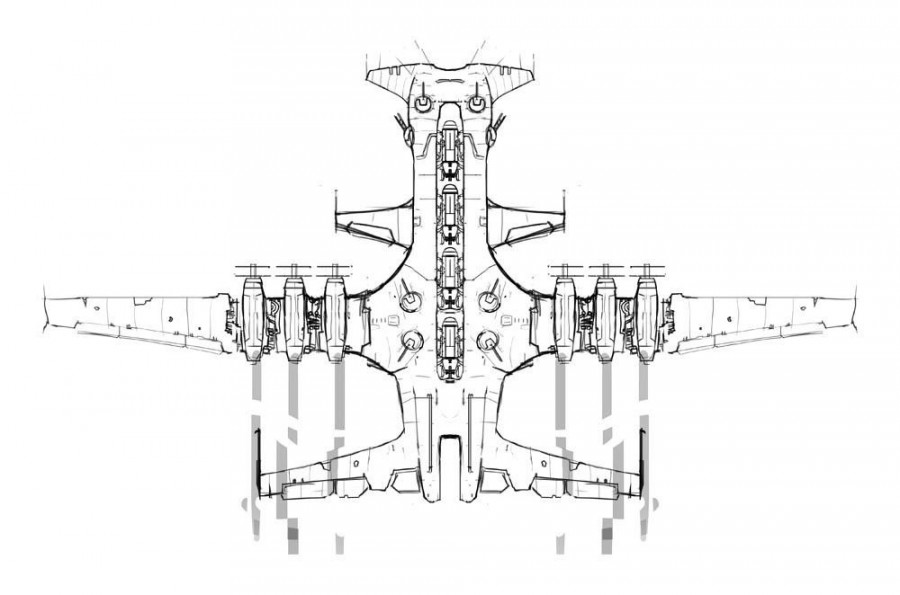
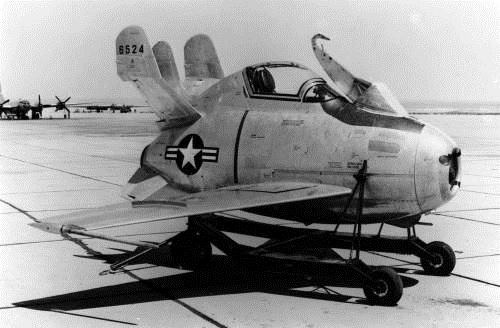
You should learn the works of other authors as well, for hundreds of years crazy mankind has created a huge number of strange objects. For example, this aircraft. It was called “Goblin” and it was supposed to be dropped from bomber-plane’s wing to protect against pursuit planes. Great idea, but the project was halted due to… the difficulties when landing.
And now, everything is planned! You have the future cartoon already in your head, you can see it, you understand it, and it’s kind of living on its own. Now we should make a couple of simple preparations – create folders. Without it you will inevitably have a lot folders named like this: “final last1”, “final last2”, final last last”, “last at least”, “!Final”, “!!!Final”, etc.
My file system looks as following:
SCENE001/
3D/
COMPOSE/
IMAGES/
RENDEROUT/
SCENE002/
And so on and so forth…
I create such file system for the whole project. If anything, you can wedge in SCENE003. Such project takes entire 2TB hard drive. Now you can imagine how much materials it contains: pictures, texts, storyboards, sequences, scenes, textures – it is endless.
To deal with such problems special programs were developed. One of them – EPP (EyeOn Production Pipeline) or simply “pipeline”. But it is right for highly organized creative teams – in such cases EPP is irreplaceable. Nowadays we have “Nuke Foundry” dominance. Honestly speaking, EyeOn, being in the same niche, gives you more features for less money. This is a question PR campaign. Nuke costs as much as the whole EPP – Fusion, Dimension, Rotation, Connection and Generation. At the same time for the past 25 years EyeOn has brought to market an ocean of innovative solutions. For example, it is the first 3D compositing on desktop. This function appeared in Nuke, too, but only six months later, and it was impossible working with it. Then everything, more or less, has been improved. Although, when working in Nuke, a feeling still appears just like waving a log in a china shop. We intentionally failed to mention “After Effects”. It is well known that genius can play on one string, but, for God’s sake, After Effects even plays snapshot sequence twice slower than Fusion and Nuke. Let alone GPU, with which Fusion can perform some (many) tasks hundreds of times faster. To say nothing of those tasks that After fails to deal with at all.
So, we have prepared the ground, it’s high time to roll up our sleeves and begin a job for real men. We recommend you hard chairs and workout every half an hour (don’t forget to switch on the alarm clock on your computer).
Now we should face the truth and decide, whether we can realize this project or not. If you think “It’s adventure time,” looking at your sketches, we won’t advise you anything, but likely you’re the Finn-boy and you will succeed. You’re feeling: “God knows, looks great,” most likely you will manage it. As the saying goes, what the eyes fear, the hands do crookedly. But if your emotions can be put into words: “Damn! It’s huge,” you should think about it twice. It makes no sense to pose youtself as a hero and try to do poor, somehow but everything. You can take first a small fragment. Make it perfect. Show to your friends. Get more resources and only then you can go on.
Since we are talking about 3D animated film (more or less), we have to create our main character. In this case it was the plane and the pilot. And, of course, fuselage paintings. The author provided his plane with one of the type. Yes, the knowledge how to draw on a tablet helps a lot.
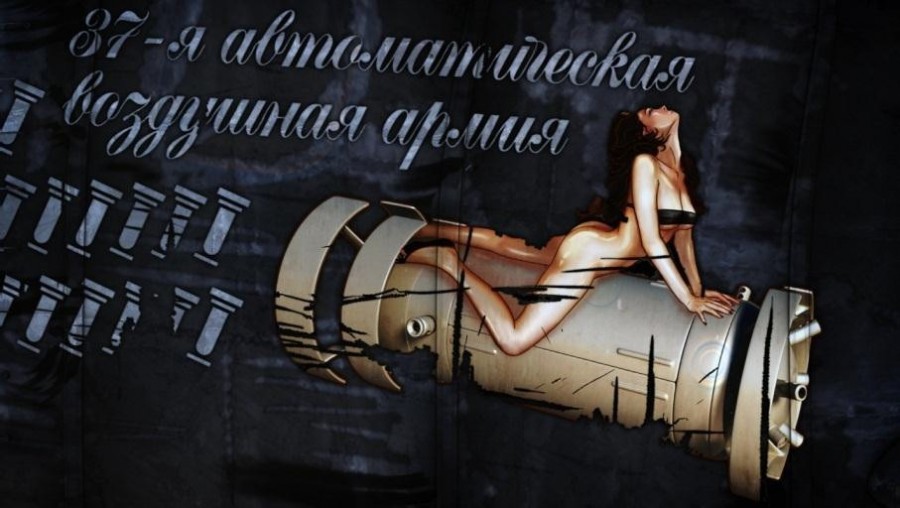
By the way, this picture exists in two versions. With and without censorship. The final video has censored version – what if children are going to watch it?
The second main character is pilot’s head, that is to say, his skull or rather the image of dead and vanished humanity. Since the cartoon is made as a parable, such image is very appropriate. And in this form exactly: without any mummies and similar stuff. Just a dead skull. Maybe, one of those that sages are depicted with on ancient engravings? For making the skull the author used ZBrush. After working with this program a couple of months, you realize that the advantages of its features cover all defects of the alien interface.
According to the author, it is not necessarily to be perfectly acquainted with all CG-programs. It would be enough to know well one program of each work stage. Dmitry has chosen the following line: Adobe Photoshop for graphics, 3DsMax for creating scenes, V-ray for rendering and EyeOn Fusion for compositing. ZBrush is not included in this list, as well as dozens of other programs, which he uses during working process. You can’t learn entirely all the software, and you need to know it only as much as it is necessary for a particular purpose. Especially when self-learning ability and desire for professional growth are being always limited by natural laziness and ordinary fatigue.
In general, the author says, his modeling process goes mostly in 3DsMax. This software has great, reliable tools. Many artists switch from Max, for example, to Maya and then blame it for a small set of options. “Having spent 12 years in Max and 8 in Maya, I can say that they have the same features,” – affirms the author. – “It’s just everybody fails to know how to work in Max and most of these features remain unnoticed. I chose Max, because this program isn’t naughty when dealing with basic tasks.”
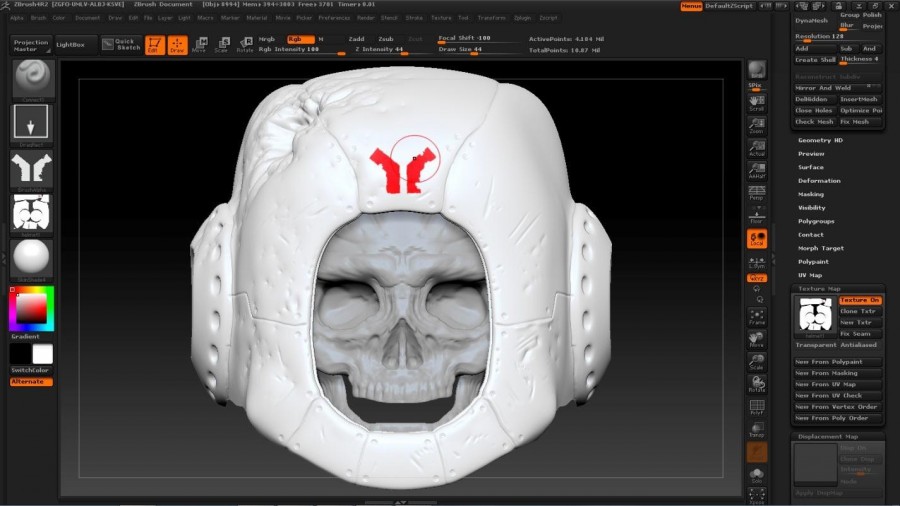
This is how our pilot looks like at the modeling stage, or rather during the sculpting. After all, in ZBrush we work not with polygons but with pixels, 2.5D design elements which allow create incredibly highly detailed models. They cannot be viewed in 3DsMax or Maya that’s why ZBrush export is primitives and displacement texture. During rendering stage in 3DsMax there are thousands of polygons extruded out of primitives with black and white texture. They are extruded separately in each render region and then unloaded from RAM. Such mesh that can be loaded and unloaded during rendering process is called dynamic. It allows you to calculate the scene with hundreds of millions of polygons, though very slowly.
Often toooo slowly. That’s why sometimes one single snapshot is enough.
As we’ve already mentioned, Fusion can work with 3D space that opens up completely new horizons.
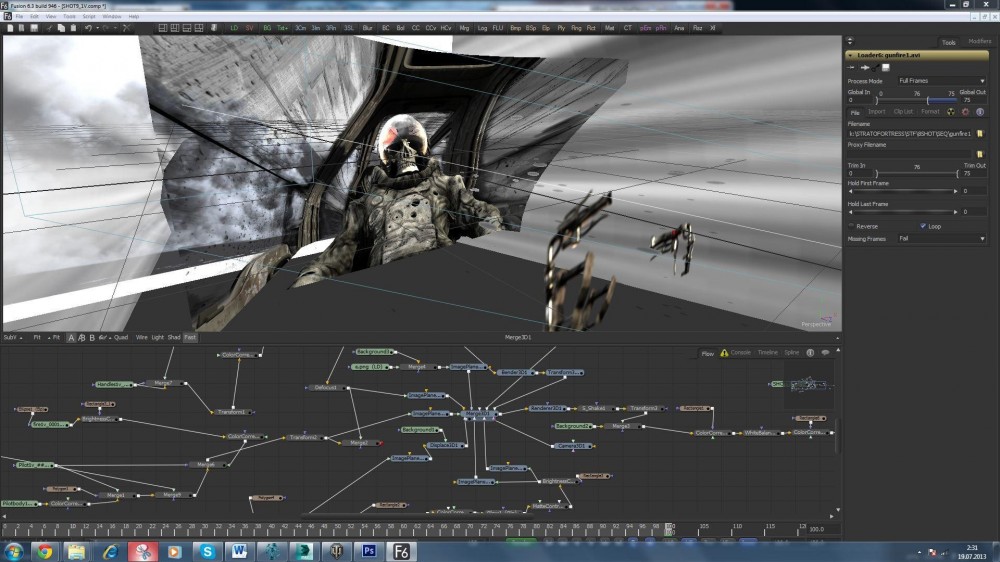
On this picture you can see that the pilot is rendered only once, although by each layer. Then these layers were placed in 3D space of Fusion and animated. The particles were also created, which are superior to all particles systems of other software for compositing. Including Nuke particles. We fix camera, add some movement and the pilot comes to live. As far as it is possible in his condition.
There wasn’t too much modeling in the project, but quite enough. The fighter, the bomber and the city from different angles. When modeling is finished, you can begin creating the scene. Objects are animated, lighted up and computed on any renderer. The author has chosen V-ray, fast renderer with beautiful lights and efficient lighting control system cards. At this stage there are lots of tricks, as well. For example, shots with our plane were made in such a way that the aircraft remained standstill and didn’t move at all. The camera attached to the controller in the center of the plane was moving. Thereby, we get the feeling that the aircraft is rocking in flight, although it was motionless. This small trick allowed computing only one global illumination card and using it in all shots. And, thus, the hour and hours of render were spared.
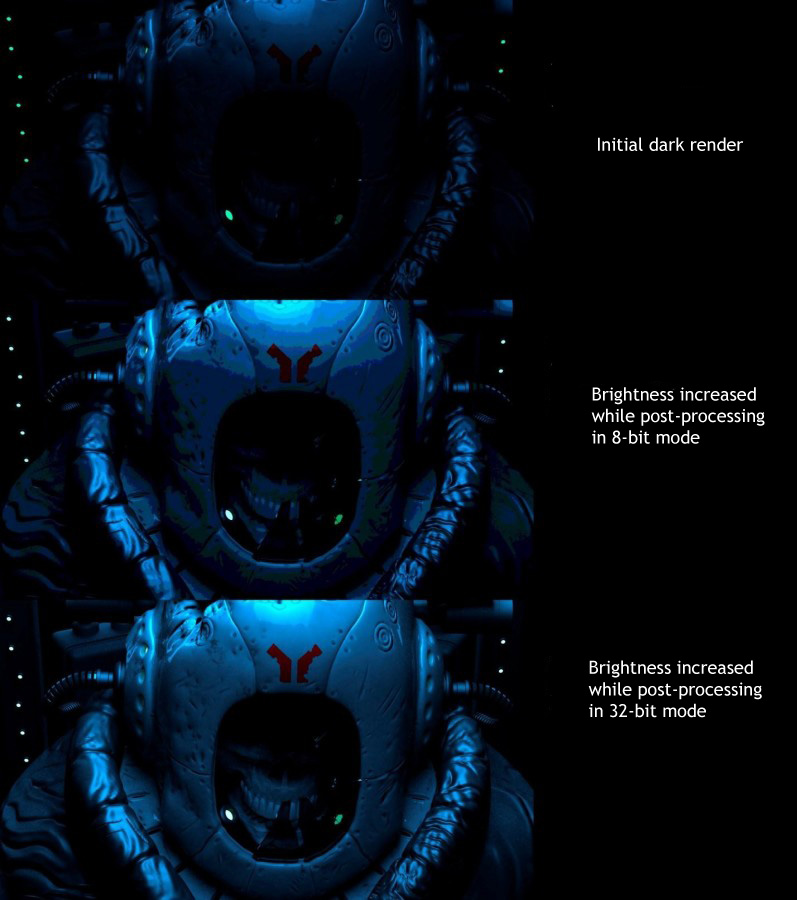
Rendering was carried out in 32-bit Full Floating Point OpenEXR format, although sequences that don’t have a lot of sense (for example, particles) were mostly rendered in 8-bit PNG. What does this mean? Of course, that each shot with additional channels sewed into it and stored in 32 bits weighs 100 MB. But then a 32-bit image contains a terrible amount of colors and tones; it also stores information even in the areas with full dimming or bright white glow. At the stage of compositing you can correct such images in any way you’d like.
And a little bit more of composing. Generally, it resembles cooking in some way. Well, now we should and here some smoke and sparkles. And then change color temperature.
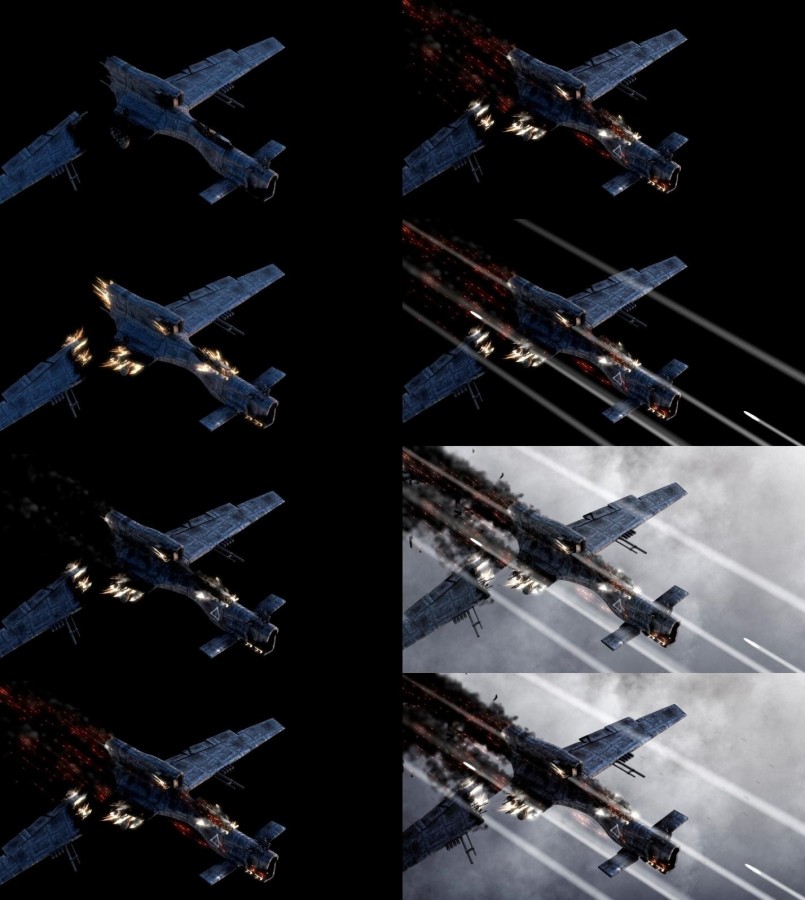
The fire, which appeared on the body of the plane, is a video of a real fire. You can make a computer fire, but, usually, it looks too unnatural. That’s why the author has chosen the video of a real fire. Making it isn’t difficult at all. Take a glass, an aerosol spray and a fire extinguisher. In a dark room spread aerosol on the glass, set it on the fire, and shoot everything on camera on a tripod. Don’t forget about the fire extinguisher. The same refers to camera shake. All programs for compositing offer built-in shaking, but they all look primitive. So, we have to use plain old fridge magnet. That is the magnet on the fridge was filmed with a shaky hand, then it was cut out on the video, and screen shaking was attached to it.
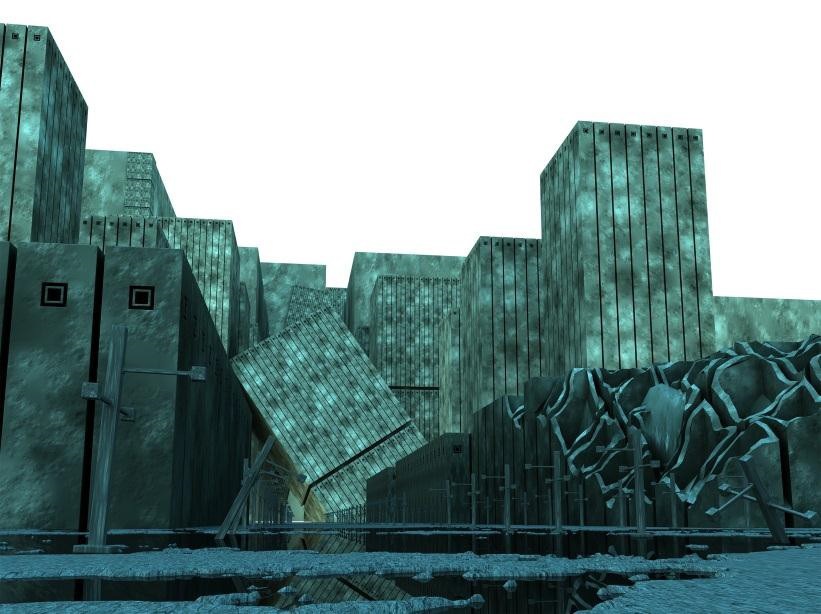
In the last shot of the cartoon matte painting was used. Usually matte painting is performed in the following way: find a bunch of pictures on the Internet and something stick them together, breaking all rules of perspective and light propagation. The correct approach in this case should be based on good photo hunting. In this particular case the author drew with the help of a tablet over the prior 3D rendering.
Here it is – our first location render. Of course, it looks rather arbitrary and has strange colors, but if we finish it a little in Adobe Photoshop, we’ll get already something like this:
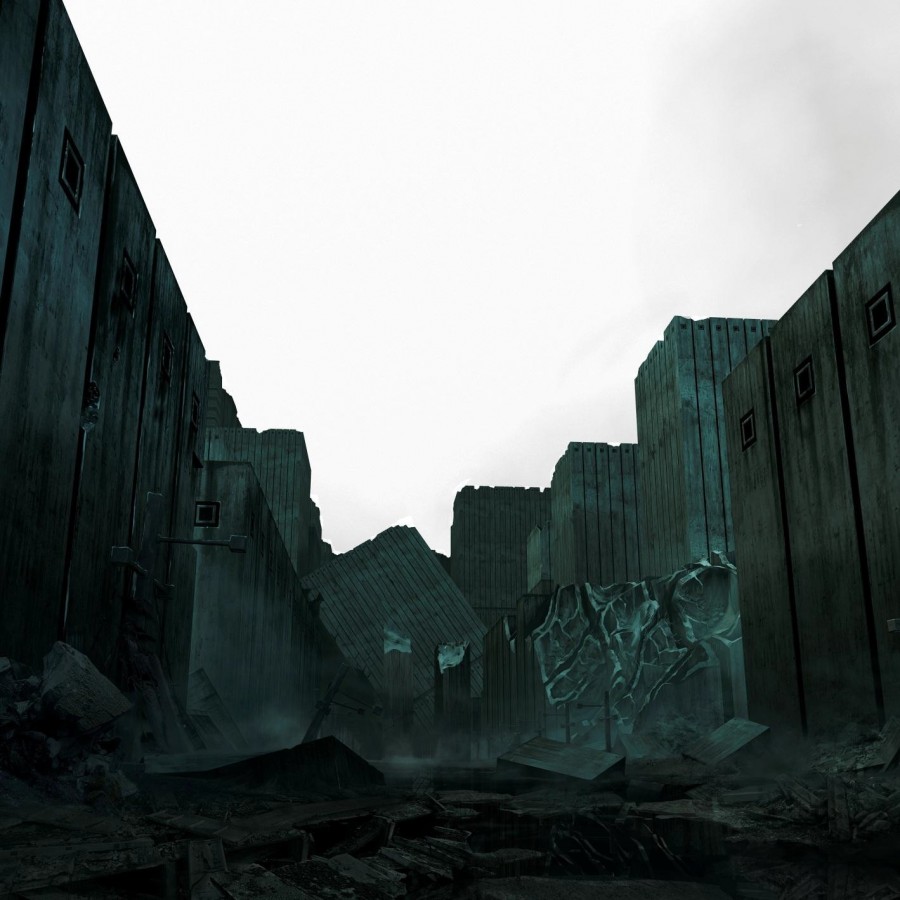
Generally, each snapshot is unique and requires an individual approach, as well as applying different techniques and new tricks. To do this you need experience and constant practice.
Assembling and soundtracks are the following. Assembling was performed in Avid software, because it is joined with Fusion through the connection module. Of course, there is no big trouble if you aren’t working with the software from the pipeline. You can just open the necessary program and continue working there. The assembling of this cartoon was started in Edius. Sound was made in super program called Reaper. This is an audio sequencer that is much more reliable than Cubase and Nuendo. At least, this is what the author tells us. Yes, and it costs 500 times less. You can choose any software and learn it. Almost every up-to-date program gives you a huge variety of features if you approach the subject from the right end.
In conclusion, we must add that each such project is a big step forward. You don’t just create something for people – you improve your skills and perfect yourself. The contemporary world gives us a lot of chances for self-development; and we aren’t limited by anything other than our natural laziness. In computer graphics, as in any other case, it doesn’t arrive well from the first time, and from the second, of course, too. But we make the road by walking.
And this is what we got:
Add a comment